If you’re considering enhancing your smile with veneers, knowing what to expect during the procedure can help ease any anxiety and prepare you for the exciting transformation. Veneers are thin, custom-made shells designed to cover the front surface of teeth, offering an immediate improvement in colour, shape, and overall appearance. Here’s a step-by-step guide to the veneer process, especially if you’re looking for veneers in Sarnia.
Step 1: Initial Consultation
The journey begins with an initial consultation. During this appointment, your dentist will evaluate your oral health to determine if you’re a good candidate for veneers. They’ll discuss your goals, explain the process, and may even show you examples of what your new smile could look like. If you’re exploring veneers in Sarnia, you’ll find that many dentists offer advanced digital imaging to help visualize the results before you commit.
Step 2: Treatment Planning
Once you decide to move forward, your dentist will develop a personalized treatment plan. This includes selecting the right shade and size for your veneers to match your facial features and natural teeth. It’s a collaborative process, ensuring that the end result looks natural and suits your aesthetic goals.
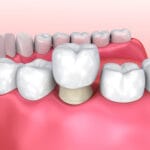
Step 3: Tooth Preparation
In preparation for the veneers, a small amount of enamel—usually less than a millimeter—is removed from the surface of each tooth. This step is crucial to make room for the veneer so that it fits perfectly and doesn’t look bulky. Don’t worry, the amount removed is minimal and ensures a comfortable, natural fit.
Step 4: Impressions and Temporary Veneers
After the teeth are prepared, your dentist will take impressions. These are sent to a dental lab where your custom veneers are crafted. In the meantime, you may be fitted with temporary veneers to protect your teeth and maintain your appearance. This temporary phase allows you to get used to the feel of veneers while your permanent ones are being made.
Step 5: Veneer Bonding
When your custom veneers are ready—usually after a couple of weeks—you’ll return for the bonding procedure. Your dentist will first place the veneers on your teeth to check the fit and color, making any necessary adjustments. Afterward, your teeth are cleaned, polished, and etched to create a strong bonding surface. A special cement is applied to the veneer, which is then placed on your tooth. A curing light hardens the cement quickly, securing the veneer permanently.
Step 6: Final Adjustments and Aftercare
After the veneers are bonded, your dentist may make final adjustments to ensure a perfect bite and comfortable fit. They’ll also give you specific instructions on how to care for your new veneers, including brushing, flossing, and avoiding habits like chewing ice or biting nails.
Good Oral Health Starts Here at Slipacoff Dental Centre!
Thinking about veneers? Slipacoff Dental Centre in Sarnia is ready to help you. Our expert team makes the veneer process smooth, comfortable, and customized just for you. Don’t wait to boost your confidence — schedule your consultation today!